

This website may contain affiliate links. When a purchase is made through our links, The Naked Diabetic may receive a commission, at no cost to you.
 . Recipe created by Tracey of The Naked Diabetic
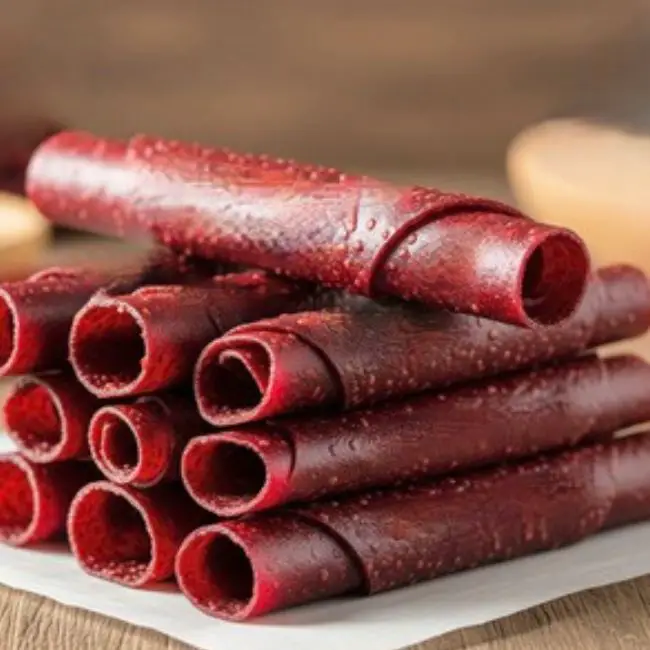
I saw a new crazy thing about Ice Cream Roll Ups using fruit roll ups. I couldn’t wait to give them a try and share them, but I needed to start by masking some good quality Sugar Free Fruit Roll Ups. These healthy snacks are easy to make and taste amazing!
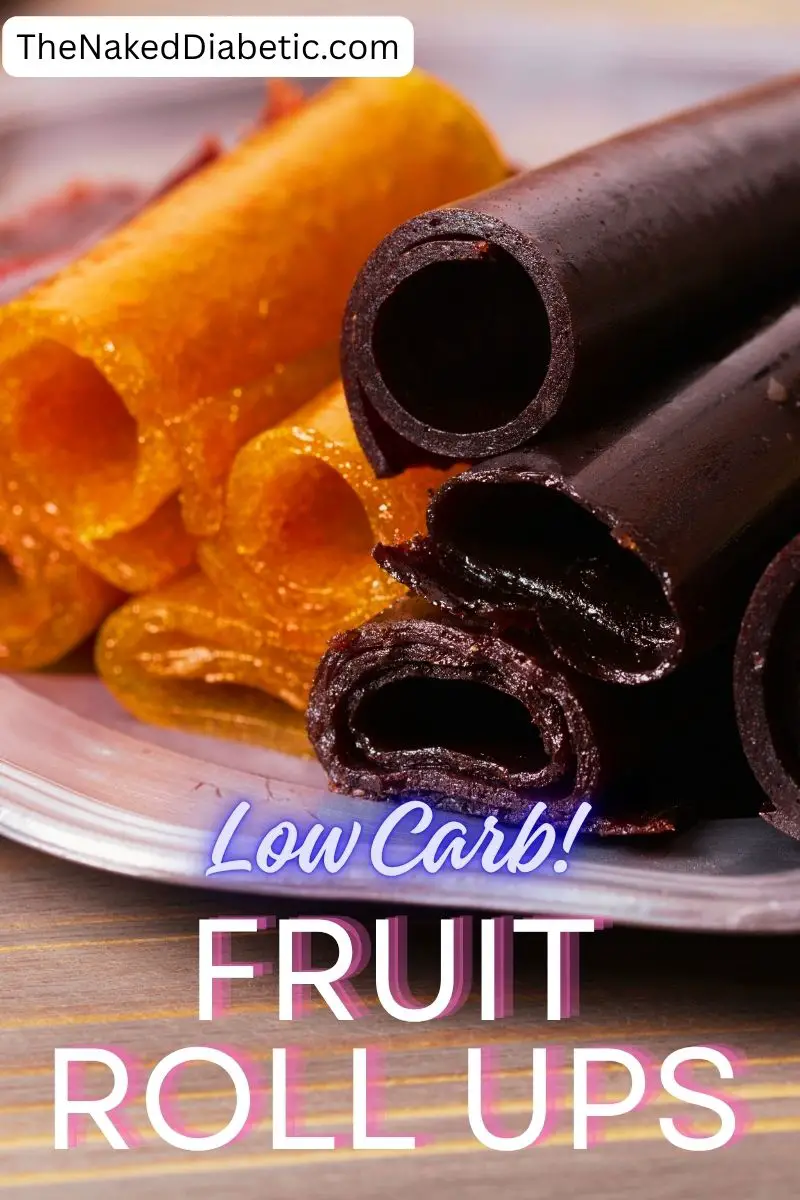
These sugar free fruit roll ups are great for kids and taste amazing. Add them to a school lunch, or cut them into shapes and decorate cupcakes or cookies with them
Ingredients List
- Fresh Strawberries (or fruit of your choice)
- lemon juice
- Splenda liquid sweetener
Special Equipment Needed
- Blender
- Silicone Mat
- Baking tray
How to Make Sugar Free Fruit Roll Ups
This recipe comes together quickly and easily.
Make sure that your fresh fruit is washed and any stems or leaves removed.
Puree the strawberries with the sweetener (or fruit of your choice) in a blender until fully pureed.
Pour the fruit through a sieve to remove any seeds. This helps to keep the fruit roll ups smooth.
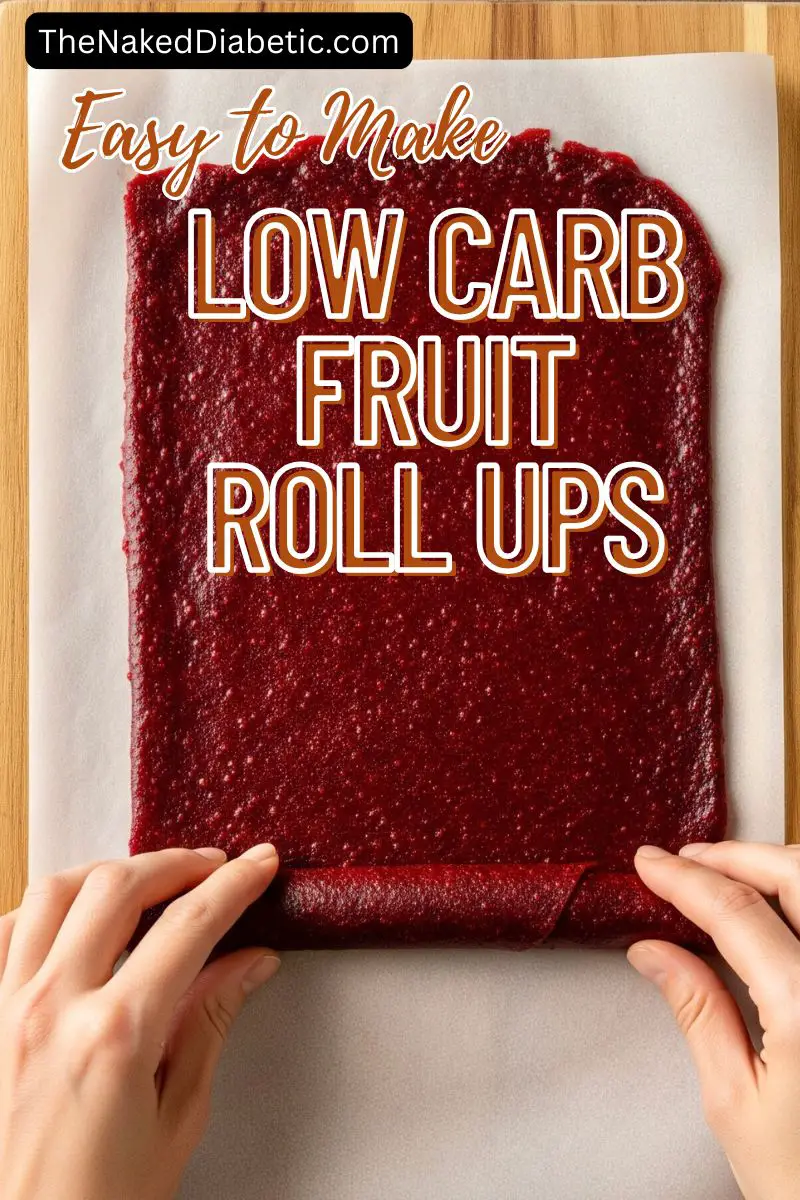
Pour onto a silicone mat-lined baking tray.
Spread the mixture out into a thin, even layer.
Bake in the oven at 175°F for 1/2 to 4 hours. Times vary depending on the thickness of the fruit mixture. Check periodically to keep it from getting brittle or drying out too much.
Remove from the oven and allow the mixture to cool completely before removing it from the pan.
Once cooled, remove it from the pan and roll it with a piece of fresh parchment paper.
Lastly, cut into rolls using clean kitchen scissors.
How to Make Sugar Free Fruit Roll Ups in an Air Fryer or Dehydrator.
To make sugar free fruit roll ups in an air fryer. You will need an air fryer that has a dehydrator mode and has shelves or layered screens. The basket-style air fryers do not work very well for roll ups.
Place the puree mix onto a dehydrator sheet or parchment paper and cut to fit the fryer screens.
Turn the fryer/dehydrator on and set it to dehydrate mode and run for about 3 1/2 hours.
Check for doneness, and if it is still sticky, run it for another 30 minutes and then check it again.
Keep repeating until the fruit is dry.
Allow it to cool and then peel the fruit off the sheet.
Roll the fruit roll up with a new piece of parchment, and then cut into rolls with a clean pair of kitchen shears.
Dehydrator Method
This is the best way to get a perfectly chewy, pliable fruit roll-up.
- Line the dehydrator trays with parchment paper or a non-stick sheet.
- Pour the fruit puree onto the sheets, spreading it into a thin, even layer (about 1/8 to 1/4 inch thick).
- Dehydrate at 135°F (57°C) for 6-8 hours, or until the puree is no longer tacky to the touch. It should feel firm but flexible.


Sugar Free Roll Ups Recipe
Sugar Free Fruit Roll Ups Recipe
Ingredients
- 3 cups fresh strawberries (or other fruit)
- 1 tsp Splenda Liquid Sweetener
- 1/2 tsp lemon juice
Instructions
- Preheat oven to 175 °F
- Add all ingredients into a blender and puree.
- Pour into a sieve, over a bowl, and strain out seeds.
- Spread the puree evenly in a thin layer, onto a silicone mat lined baking sheet. (or parchment lined)
- Bake for 3 hours or until dry to the touch.
- Remove from the oven and allow to cool before handling.
- Cut into 8 equal sized shapes or roll up in a clean piece of parchment paper.
- Store at room temperature for 2-3 days or refrigerate for up to 2 months.
Nutrition
Nutrition information is provided as a courtesy and is automatically calculated using an online nutrition calculator. We encourage you to calculate nutrition data with your specific brand ingredients as nutritional information can vary between brands
Tips and FAQs
Choosing Fruit
Low-Carb Fruits: Not all fruits are created equal when it comes to carb content. The best choices for this recipe are:
- Berries: Strawberries, raspberries, and blackberries are excellent. They are naturally lower in sugar and high in fibre.
- Rhubarb: Though technically a vegetable, it’s often used in fruit recipes and is very low in carbs.
- Lemon or Lime Juice: A little bit of citrus can brighten the flavour and help with the texture.
What to avoid (or use sparingly): Bananas, mangoes, grapes, and pineapples are delicious, but they are much higher in natural sugars and carbs, so it’s best to save those for occasional treats or in very small quantities.
Cutting Sugar Free Fruit Roll Ups into shapes.
Cut the sheet of fruit roll ups into cute shapes and use them as decorations on baked goods.
To cut custom shapes, lay shapes cut from wax paper on top and cut around the edges, or use edible markers to draw the shapes onto the fruit roll ups. Use water-soluble food colouring pens. After you have drawn your shapes, cut around the lines.
To remove any lines, use a wet paper towel and dab off the colour. Only draw a single line, as food writers are food dye-based and sometimes are hard to remove.
Storing and Freezing
Ensure Complete Dryness: This is the most crucial step! If your fruit leather isn’t completely dry (meaning no sticky spots and it peels easily without tearing), it’s more prone to mold and spoilage. It should be pliable but not tacky. If it feels sticky, continue drying it in your dehydrator or oven for a bit longer.
Roll with Parchment Paper: Once cooled, carefully peel the fruit leather off your silicone mat or parchment paper. If you’ve made a large sheet, cut it into strips. Roll each strip tightly with a piece of fresh parchment paper (or the original parchment paper if it’s clean and intact) to prevent them from sticking to each other. Wax paper can also work, but parchment is generally preferred as wax paper can sometimes melt or transfer wax.
Airtight is Key: The primary goal is to protect your fruit roll-ups from moisture and air, which can cause them to become brittle, sticky, or mouldy.
- Airtight containers
- Glass jars with tight-fitting lids, plastic food storage containers with secure seals.
- Resealable plastic bags: Squeeze out as much air as possible before sealing.
- Vacuum-sealed bags: For the longest shelf life, especially if you’re making a large batch for long-term storage.
Room Temperature Storage:
If properly dried and stored in an airtight container in a cool, dark pantry or cupboard, your fruit roll-ups can last for 1-1.5 weeks. Avoid areas with direct sunlight or fluctuating temperatures. If you live in an are with high humidity, string refrigerated is a better option.
Refrigerate for extended freshness and to prevent them from becoming too sticky. Store them in an airtight container in the refrigerator. They can last for up to 6 months or more this way.
Freezer – Place the parchment-wrapped rolls into a freezer-safe airtight container or freezer bag. They can maintain their quality for up to 6 months in the freezer. Wehn thawing, you may fiond they wetter than desired, allow to sit on a cooling rack that allows air circulation to dry out.
There you have it! Delicious, guilt-free, sugar-free fruit roll-ups that will transport you back to your childhood, all while keeping your health goals on track.

This website may contain affiliate links. When a purchase is made through our links, The Naked Diabetic may receive a commission, at no cost to you.