Disclaimer -This post may contain affiliate links. When a purchase is made through our links, The Naked Diabetic may receive a commission, at no cost to you.
 . Recipe created by Tracey of The Naked Diabetic
Who doesn’t love a tasty bowl of freshly made Chili? It doesn’t matter where you live, you can always find someone who loves chili. After winning a couple of local chili contests, I decided that I needed to refine my recipe into a diabetic-friendly chili recipe. Pair it with some of our diabetic-friendly cornbread and you’ve got a fantastic diabetic-friendly meal. Don’t forget to add a diabetic-friendly dessert!

When you are looking at other chili recipes, you will notice that some of them are super high in carbs, but not our diabetic-friendly chili recipe. We have cut some of the carbs but not the goodness and that great chili flavour. We have even kept some of the beans.
When asked if diabetics can eat beans the answer is usually yes. Baked beans have a lot of added sugar, so beware of those, but kidney beans, pinto beans and other beans that are high in fibre and protein can help keep blood sugars stable because they are low on the glycemic index. (unlike many other starchy foods)
Reccomended Kitchen Tools
- Enameled cast iron Dutch oven ( if you want to use a crock pot or Instapot, see notes below)
- large wood spoon
- cutting board
- chef’s knife or equivalent
- measuring cups
- measuring spoons
Ingredients List
- 1.5 pounds of lean ground beef
- 28-ounce can of diced tomatoes
- 1 large cooking onion
- 1 green bell pepper
- small can of red kidney beans
- 2 cloves of garlic
- chili powder
- 9-ounce can of sliced mushrooms
- salt
- black pepper
- olive oil
- Walden Farms Maple Walnut or Maple Bacon syrup
The Best Diabetic-Friendly Chili Recipe
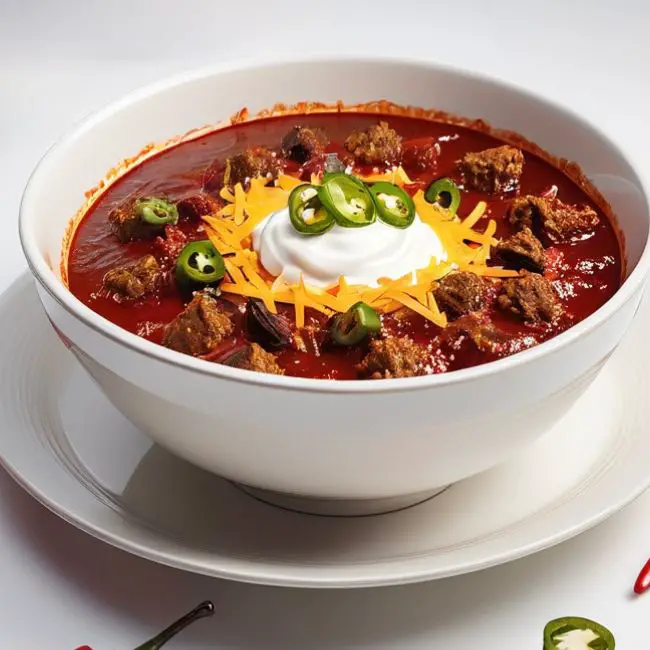
Diabetic-Friendly Chili Recipe
Ingredients
- 1 tbsp Canola Oil (15 ml)
- 1 1/2 lbs lean ground beef (0.7 Kg)
- 1 green bell pepper
- 1 large onion – chopped
- 28 ounce can of diced tomatoes (796 ml)
- 9 ounce can of sliced mushrooms -drained (266 ml)
- 1 cup red kidney beans – rinsed (240 ml)
- 1/2 tsp salt (2.5 ml)
- 2 cloves of minced garlic
- 1/4 tsp black pepper
- 3 tbsp chili powder (45 ml)
- 3 tbsp Walden Farms maple walnut or Maple bacon syrup (45 ml)
Instructions
- In an enamelled cast iron dutch oven add oil and heat to medium / high heat.
- Add the ground beef, crumbling it apart, with a wooden spoon.
- Add the chopped onion, garlic and chopped green pepper, to the ground beef while browning. Stir continuously to prevent burning.
- Once the meat is browned reduce the heat to low / medium before adding the rest of the ingredients.
- Add the chili powder and stir until the meat mixture is well coated.
- Stir in drained mushrooms and the rinsed kidney beans.
- Add the Walden Farms syrup and stir into the mixture.
- Add the diced tomatoes, salt and pepper and mix well.
- Bring the chili mixture to a full boil and allow to boil vigorously for 5 minutes, while stirring to prevent burning or sticking to the bottom of the pan.
- Reduce the heat and simmer for 15 minutes.
- Remove from heat and allow the chili to cool slightly. Keep the lid on the pan while cooling.
- Before serving, bring the chili mixture to a full boil again for 5 minutes, stirring continuously.
- Reduce the heat and simmer again for 15 minutes. Stir periodically to prevent sticking.
- Allow to cool with the lid on the pan.
- Repeat the boiling process 2 more times if time allows.
- When not stirring, keep the lid on the pan.
- Serve hot,
- NOTE . If the Chili needs more liquid, add water or beef broth.
Nutrition
Nutrition information is provided as a courtesy and is automatically calculated using an online nutrition calculator. We encourage you to calculate nutrition data with your specific brand ingredients as nutritional information can vary between brands

Helpful Hints to get the best Diabetic-Friendly Chili
What is the secret to the best chili?
I have made chili many ways, and I always come back to a tried and true method of allowing my chili to simmer at a very low temperature, allowing all of the flavours to mix and absorb into each other.
Lots of people will;l tell you that the secret to great chili is adding cinnamon, coffee, beef broth, jalapenos and cocoa, but all of those ingredients are all about your personal flavour preferences and not about the richness and full-bodied flavour of the chili.
The answer that always works for me is to give it a couple of good rolling boils while stirring and then go low for about 10 to 15 minutes, on and off, letting it rest in between, for a couple of hours. That may seem like a long time but that is how you get the best results. If you can do this 3 or 4 times, the flavours will be blended, and you get that rich chili flavour.
Why do we add Walden Farms syrup?
When a traditional chili recipe is made, it usually has canned baked beans as an ingredient. The baked beans usually have maple syrup or a sweet flavour which punches your chili of sweetness along with the hot chili. Since we are not adding the baked beans (because of the carbs) we can get the sweetness that we would normally get from the beans by adding the Walden Farms syrup. Walden Farms syrups have zero calories, zero carbs and zero fat, making them a staple in our diabetic-friendly pantry.
Making this recipe without beans.
I like the beans added as it is a more traditional style recipe. If you want to omit the beans, feel free. It will reduce the carbs, protein and calories further. You can easily alter this recipe to your liking, just keep in mind that any alteration also changes the nutritional value.
Can I switch out the beans in this Diabetic-Friendly Chili Recipe?
I use dark red kidney beans in this recipe, simply because that is pretty traditional. You can switch to black beans or navy beans, but avoid canned baked beans. Canned baked beans often contain sugars or maple syrup, boosting the carbs, which is what we are trying to avoid.
When switching beans, look for beans that are high in fibre, which will help reduce the carbs.
Serving Diabetic-Friendly Chili
Serve freshly made chili topped with a dollop of sour cream, greek yogurt, or some sliced green onions.
For cheesy options add grated parmesan cheese, grated cheddar or spicy jalapeno cheddar cheese.

Can this recipe be cooked in a crockpot or Instant Pot?
This recipe can most certainly be cooked in both a crock pot and an Instant Pot. Follow the cooking instructions for your appliance. Most crock pots or Instapots have a chilli recipe. But you will not get the best results with either of these. The key is simmering and allowing the flavours to intermingle. Both a crock pot and an Instapot are designed to cook for a specified time at a consistent temperature or pressure cooking, and do not give you a rolling boil and simmer throughout the process. If this is your preferred method of cooking it is fine. After all, it is up to you in the end.
If using an InstaPot, be mindful of the chance of burning the meat. I do not brown my meat in my Instapot, simply to avoid the dreaded burn, but some people swear by it.
Storing Diabetic-Friendly Chili
After making our diabetic-friendly chili recipe, if by some chance there are leftovers, you can store them for up to a week in an airtight container in the refrigerator.
This chili also freezes well for up to a month, in an airtight container.
I hope that you enjoy our diabetic-friendly chili recipe. It is a favourite in our house and is a traditional comfort food that we love to enjoy.


